Ma turned the strips of muslin and pinned them together and Laura whipped the new seam, over and over with tiny stitches.
—By the Shores of Silver Lake

Laura, who didn’t like to sit and make fine stitches as a young girl, became very good at her handicrafts later in life. She made beautiful quilts, lovely buttonholes for a job in town, and handicrafts to help earn money to send Mary to the blind school. Sewing was part of her life and now we celebrate that lovely tradition with this hoop project. Follow the directions by @wildboho and create your own Laura Ingalls Wilder-inspired sampler project.
Unfortunately, the specific fabric for this project is no longer available from Andover. Please check with your local fabric store to see if they can help you find something similar.
Directions for the Little House on the Prairie Hoop

Step 1: Place hoop where desired on the background fabric and trim, leaving approximately 1-2” excess fabric all the way around your hoop. Set aside.

Step 2: From the 5 Fat Quarters, cut or rip 5 strips of fabric approximately 1-½” wide by 9” long.

Step 3: To each fabric strip, apply glue from the glue stick and press on to the fabric. Begin with the top strip and layer all 5 pieces of fabric, working towards the bottom of the hoop.

Step 4: From the Laura Ingalls fabric, choose one “Laura” and trim out of the fabric. Do not cut too close to the design at this point.
**Depending on the cut of fabric that you have for the background fabric, your placement of “Laura” will vary. Be sure to purchase the fabrics with “Laura” going in the same direction.**
Once you have cut out “Laura,” trim a piece of Heat ‘N’ Bond to her size and follow the directions for applying that to the fabric. You want the paper-backed side of this to be on the back of Laura. Peel off the paper and place her where you want her to be on the fabric. Iron her to the fabric. Secure the hoop onto the fabric, tightening the fabric as you tighten the hoop.

Step 5: Embroider your hoop using the below stitches.

Fabric Strips: Laced Running Stitch
(DMC colors from top to bottom):
- 347, 3820
- 209, 3834
- 420, 725
- 738, 3777
- 501, 598
Landscape (from top of the fabric to bottom):
- Trees: Detached Chain Stitch
DMC 730, 3012 - Ground: Back Stitch
DMC 420 - Wagon: Back Stitch
DMC 420, 738, 3777 - Grass: Straight Stitch
DMC 730, 890 - Wheat:
DMC 356, 420, 738, 3820 - “Laura” Dress, Hair, Boots: Backstitch
DMC 209, 347, 356, 420, 520, 738, 3834

Step 6: When finished embroidering, trim the fabric around the hoop to approximately ¾” and glue the fabric to the wood hoop. Let the glue dry and hang your hoop with a piece of decorative ribbon or place it on a shelf!

We can’t wait to see what you created. Please share it with us on our Facebook page and on Twitter/Instagram using the hashtag #LittleHouseMoment!

Directions for the Little House on the Prairie Hoop
Step 1: Place hoop where desired on the background fabric and trim, leaving approximately 1-2” excess fabric all the way around your hoop. Set aside.
Step 2: From the 5 Fat Quarters, cut or rip 5 strips of fabric approximately 1-½” wide by 9” long.
Step 3: To each fabric strip, apply glue from the glue stick and press on to the fabric. Begin with the top strip and layer all 5 pieces of fabric, working towards the bottom of the hoop.
Step 4: From the Laura Ingalls fabric, choose one “Laura” and trim out of the fabric. Do not cut too close to the design at this point.
**Depending on the cut of fabric that you have for the background fabric, your placement of “Laura” will vary. Be sure to purchase the fabrics with “Laura” going in the same direction.**
Once you have cut out “Laura,” trim a piece of Heat ‘N’ Bond to her size and follow the directions for applying that to the fabric. You want the paper-backed side of this to be on the back of Laura. Peel off the paper and place her where you want her to be on the fabric. Iron her to the fabric. Secure the hoop onto the fabric, tightening the fabric as you tighten the hoop.
Step 5: Embroider your hoop using the below stitches.
Fabric Strips: Laced Running Stitch
(DMC colors from top to bottom):
- 347, 3820
- 209, 3834
- 420, 725
- 738, 3777
- 501, 598
Landscape (from top of the fabric to bottom):
- Trees: Detached Chain Stitch
DMC 730, 3012 - Ground: Back Stitch
DMC 420 - Wagon: Back Stitch
DMC 420, 738, 3777 - Grass: Straight Stitch
DMC 730, 890 - Wheat:
DMC 356, 420, 738, 3820 - “Laura” Dress, Hair, Boots: Backstitch
DMC 209, 347, 356, 420, 520, 738, 3834
Step 6: When finished embroidering, trim the fabric around the hoop to approximately ¾” and glue the fabric to the wood hoop. Let the glue dry and hang your hoop with a piece of decorative ribbon or place it on a shelf!
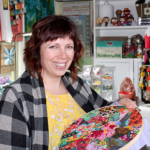
An avid stitcher, thrifter and coffee drinker, Nichole is a self-taught embroidery and textile artist. A collector of threads and fabrics, she loves to combine color and texture and pattern into hoop-shaped palettes. Located in Bucks County, Pennsylvania, she spends her non-stitching time with her husband and two small boys, discussing gardening and trains and Minecraft, usually all at the same time.
How did you ever learn how to do the stitches and self taught embroidery!? Just awesome! I want some talent like that
I want to try this, it looks SO fun and beautiful!
Oh, this is absolutely lovely! I am a lifelong fan of the Little House books and have thoroughly enjoyed sharing them with my children in the last couple years. I promptly went online an purchased the fabrics and will anxiously receiving them to start my project. I have a couple questions for you as I read through this… With just using the glue stick to apply to fabrics to the bottom part (and then embroidering them), did you have problems with the fabric coming unattached? Also, how many threads of floss did you use for your embroidery? I don’t have a lot of experience with embroidery; I’m more of a quilter. Thank you for your help!
Do you have the Patten with the covered wagon in a hoop?
Is there a conversion on this pattern for counted cross-stitch? If not, is there anyone who could do that (make this into a cross-stitch pattern)?
I AM AMAZED AT ALL THE WONDERFUL IDEAS AND INFORMATION THIS SITE OFFERS. I AM NOT A HANDS ON QUILTER, KNITTER, STITCHER, EMBROIDERER, OR CRAFTY LADY BY ANY MEANS. HOWEVER, I ABSOLUTELY LOVE SEEING ALL THE ITEMS CREATIVE PEOPLE CAN DO. I JUST LOVE ALL THE RERUNS OF LITTLE HOUSE ON THE PRAIRIE. IT REALLY MAKES ME WANT TO GET INVOLVED IN BEING MORE HANDS ON. THANK YOU SO MUCH FOR SHARING ALL THESE WONDERFUL IDEAS. I’LL PROBABLY MESS UP MY FIRST FEW, BUT I AM BOUND AND DETERMINED TO GET STARTED.
Where do I get pattern for embroidery? Is it preprinted with fabric. Love all the Little House fabrics..
I found the fabrics for this project on the following site: http://www.fatquartershop.com/andover-fabrics/little-house-on-the-prairie-fabrics-andover-fabrics
Gorgeous! Thanks for sharing these!
What a fun and beautiful hoop!
I have been watching Little House On The Prairie ever since i was the 80’s and still watching them now. I am trying to save up the money to get the complete series on DVD AND THE BOOKS…..