Mary was braiding a new rug. She had cut worn-out woolen clothes in strips, and Ma had put each color in a separate box. Mary kept the boxes in order and remembered where each color was. She was braiding the rag-strips together in a long braid that coiled down in a pile beside her chair.
—The Long Winter
On the prairie, no scrap of fabric could go to waste, and you had to do what you could to make your home feel cozy. From beautiful quilts, to fashion accessories, no scrap went unused. Ma’s resourcefulness is one of the things we love so much about her.
When reading the Little House on the Prairie books as a child, I loved to learn how the Ingalls girls used what they had to make lovely decorations, like braiding rags into rugs. Their creativity has inspired this fun and easy DIY project. All you need to know is how to cut, braid, and stitch. You don’t even need to do any of these particularly well to get a great result.
Supplies for Your Braided Rug Inspired Placemat

- Assorted shirts
- Scissors
- Rotary cutter
- Ruler
- Safety pins
- Needle and thread
How to Make a Braided Rug Inspired Placemat
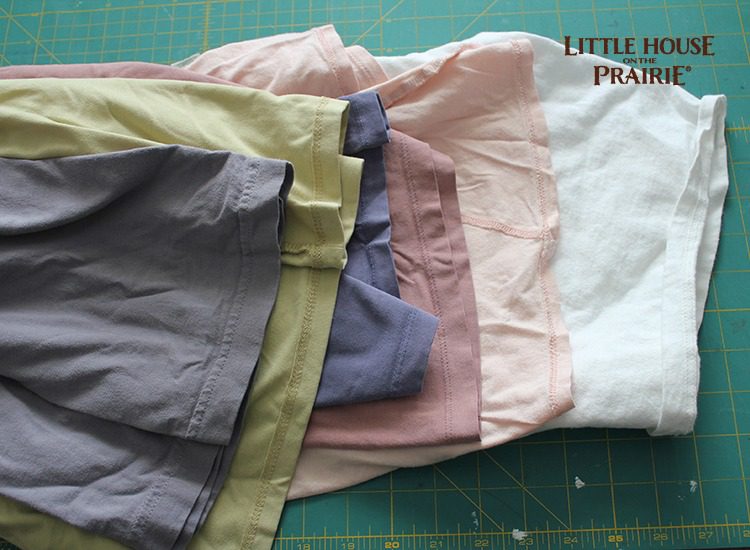
Start by selecting your shirts. For contrast, look for different colors.
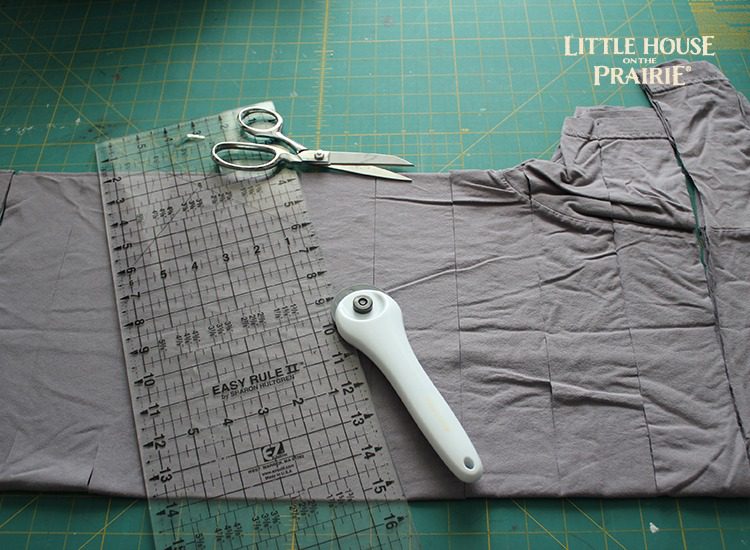
Fold the shirts in half down the front. Using scissors, cut down one of the sides. Cut off the bottom hem, then cut up the shirt into 2.5″ strips. Repeat for all the shirts.

Select three strips, pin the ends of the three strips together.
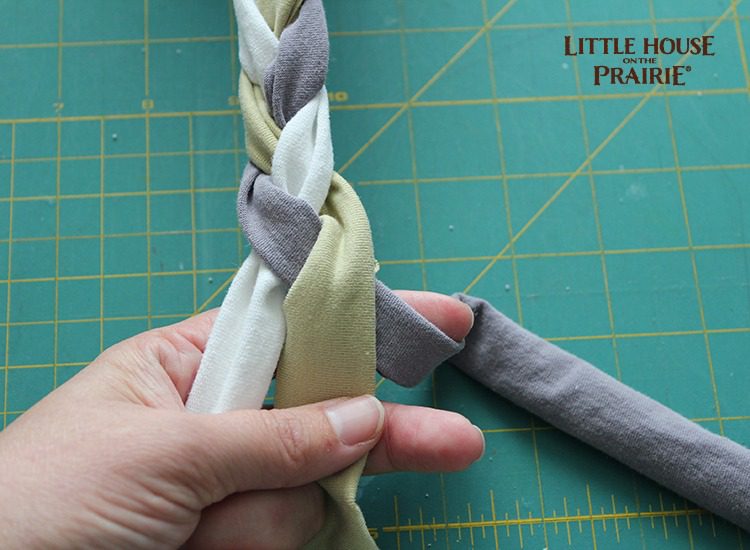
Braid the strips together.
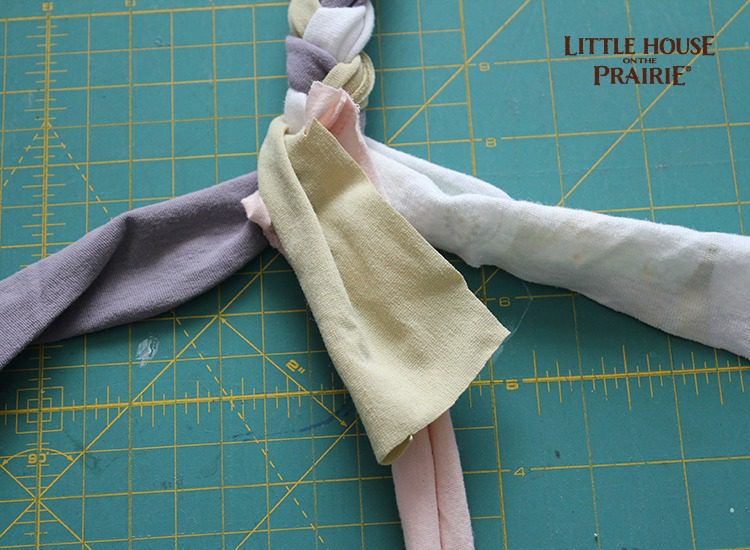
When you get to the end of one strip, add a new strip of fabric by overlapping the last two inches and securing it as you braid.
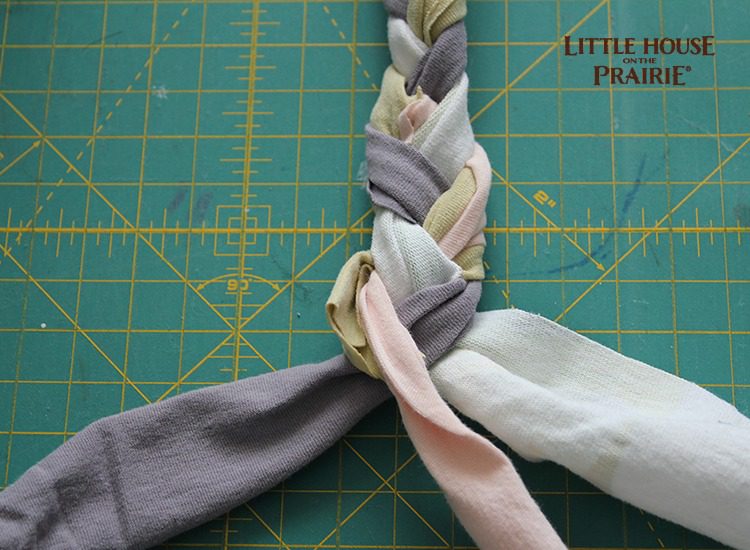
As you continue braiding, the new color will be secured, as you can see with the peach strip above.
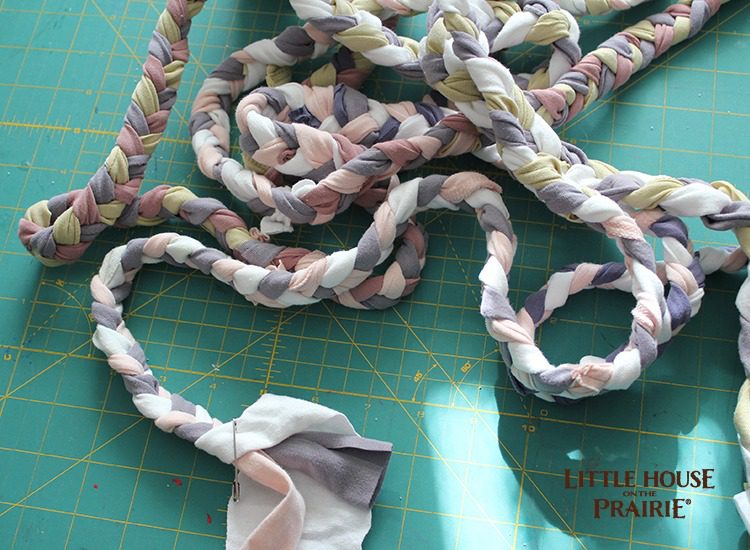
Keep adding new strips and braiding them in until your braided rope is long enough for the rug you want to make. Use a safety pin to pin the ends together.
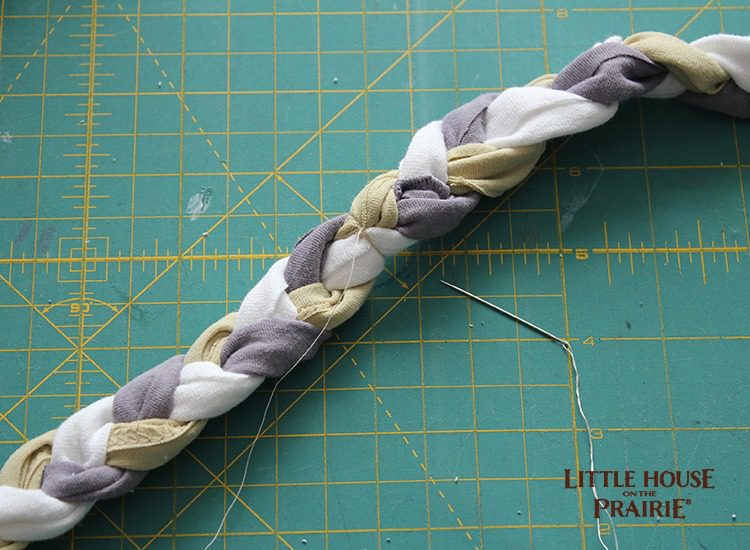
Thread your needle. Wrap the thread around one end of the braided rope, cutting off the excess braid.
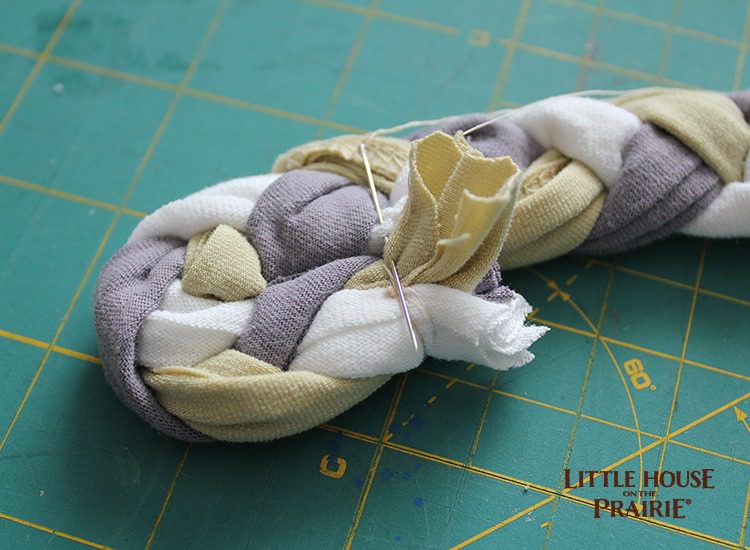
Fold about 1.5″ of the braid back over on itself. Stitch together the sides that are touching. Don’t worry if your stitches show, this will be the underside of the braided rug.
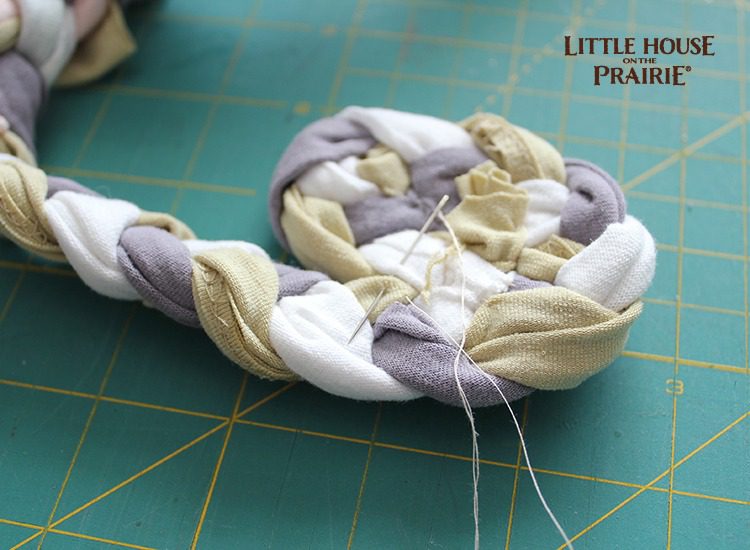
Spiral the braid around, stitching in place as you go.
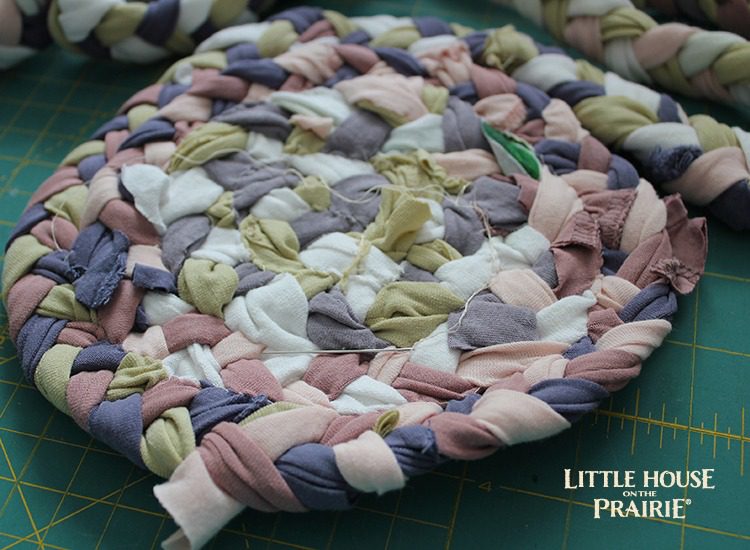
Keep spiraling the braid around, and keep stitching.
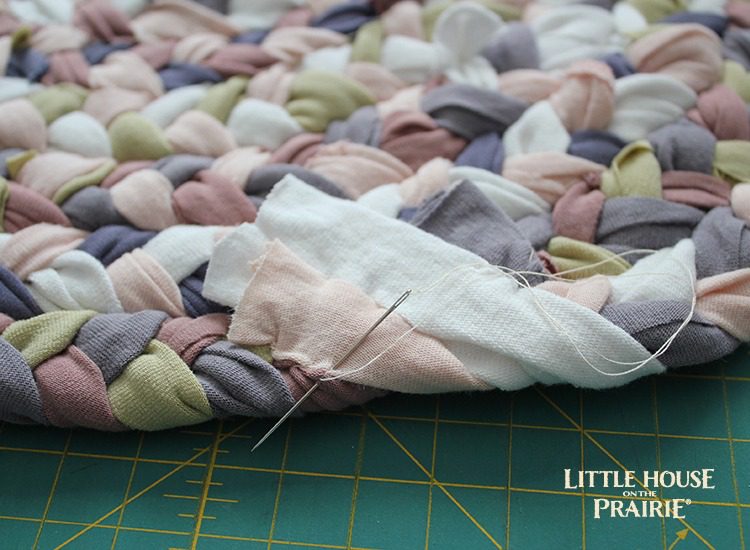
When you get to the end of your braid, decide if your rug is large enough. If it is not large enough, you can braid in more shirt strips, and keep going. Once the rug is large enough, trim the ends, tuck them to the back, then stitch in place.
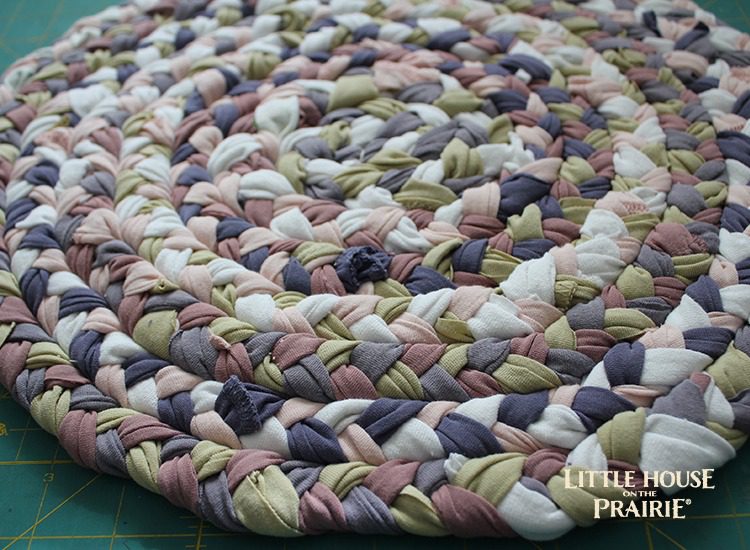
Flip over your braided rug – you’re all done!
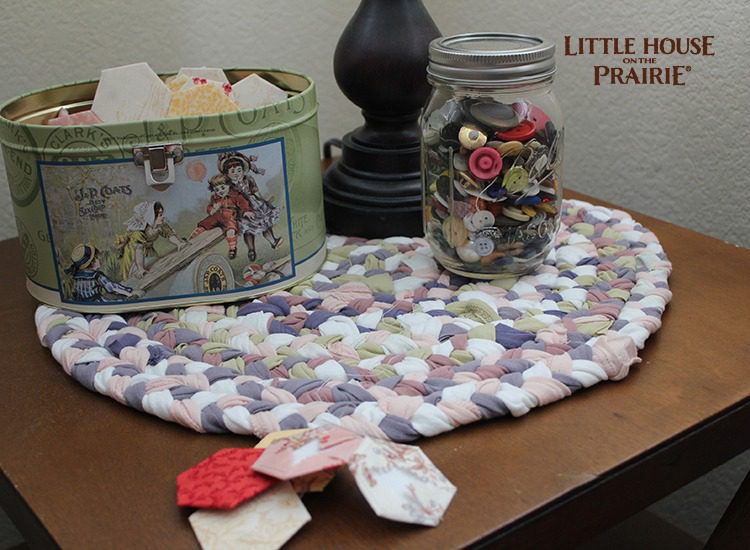
This is so beautiful and such a practical item. Use a series of these as old-fashioned placemats, or create a slightly larger oval-shaped rug to use as a table centerpiece. See more fabric craft ideas to inspire your pioneering spirit!
Sign up for our FREE monthly email newsletter to keep you up to date on the latest Little House on the Prairie crafts and DIYs that you can do at home.
Printable Instructions
Supplies
- Assorted shirts
- Scissors
- Rotary cutter
- Ruler
- Safety pins
- Needle and thread
Instructions
- Fold the shirts in half down the front. Using scissors, cut down one of the sides. Cut off the bottom hem, then cut up the shirt into 2.5″ strips. Repeat for all the shirts.
- Select three strips, pin the ends of the three strips together.
- Braid the strips together.
- When you get to the end of one strip, add a new strip of fabric by overlapping the last two inches and securing it as you braid.
- As you continue braiding, the new color will be secured, as you can see with the peach strip above.
- Keep adding new strips and braiding them in until your braided rope is long enough for the rug you want to make. Use a safety pin to pin the ends together.
- Thread your needle. Wrap the thread around one end of the braided rope, cutting off the excess braid.
- Fold about 1.5″ of the braid back over on itself. Stitch together the sides that are touching. Don’t worry if your stitches show, this will be the underside of the braided rug.
- Spiral the braid around, stitching in place as you go.
- Keep spiraling the braid around, and keep stitching.
- When you get to the end of your braid, decide if your rug is large enough. If it is not large enough, you can braid in more shirt strips, and keep going. Once the rug is large enough, trim the ends, tuck them to the back, then stitch in place.
- Flip over your braided rug – you’re all done!
A crafty mom of 2 active boys, Carolina prefers sewing, gluing, and painting to doing laundry and dishes. She has been sewing since she was 6, quilting since she was 12, and can't remember a time she wasn't creative. X-rays have proven she doesn't have an un-crafty bone in her body!


Would love to do but do not know how but I can braid. Just don’t know how to put it together never knew about crafts find it difficult but I would love to do . I love ❤️ the series have watched it all the way through many times on my 3rd cancer and find that Little House on the Prairie ♥️Heart warming full of love and very entertaining and enjoyable!!!!! I wish I could see the 50tg or any year reunion I know we have lost may but they are all in my heart forever just like the show!!!!!
I have several Pendleton wool flannel shirts from my late father. I am wondering if these would be good to use for a braided rug or braided seat cushions? If so, what kind of other material(s) could I combine with it?
I have braided with used t-shirts twice now and keep the fabric flat on the table while I’m attaching the braids. The first time I thought maybe I pulled the fabric to tight so the second time I attached the braids looser. Both times the fabric once lifted off the table won’t lay flat again. please help.
Thank-you.
Helen
What a wonderful craft to run into! I am looking forward to making my own rug, with my goal being to use it as a bath mat! Thank you for the simple to follow tutorial. 🙂
Hiya! Is there a way to prevent the edges from rolling in? I’ve tried it a couple times and it looks like a bowl… Any advice? Thanks!
I haven’t made a rug yet but i have heard that the sweet grandmas in my family that used to make them would stick them between the bed mattresses until they flattened out 🙂 hope that helps.
I received boxes of material, all cut into small squares like 5 inch by 5 inch. Is there anyway I can make into braided rug somehow?
The person that gave me material runs a dog rescue and was hoping to raise money by possibly making quilts and braided rugs.
I am looking for a heart shaped pattern would you know where I could find one?
Would jeans work for this? I have many with rips from my husband looking for a way of using them.
Hi Carolina, I’m SO excited to try this! My great grandma used to quilt and make rag rugs. I have a quick question that I didn’t see previously asked or answered in the instructions. How big is the placemat and how many T-shirts did it take to make it?
Thank you so much for all the crafty ideas! Now that I’m no longer able to work due to a back injury, I have tons of free time and need ideas to keep me busy!
Looks great. Just wondering if there is anyway to make it thicker, I have a dog that destroys every bed I give him, he rips them open and pulls out all the stuffing so I’m going to try and make him one that has no stuffing but I want him to be comfortable on it, any ideas would be great.
The rope stitching with a zig zag stitchI am trying to make a braided place mat with a tiny rope doubled together and wrapping the fabric around my problem is how to end the mat!
My problem is how to end the braided place mat I am sing the twine method doubled then wrapping the fabric around the twine but how do I end it what do I do with the tail?
i love your look of this. but what needle and thread do you reccomend for sewing this?
Nevermind! Found the link to the Facebook page under the Community section of the website. 🙂
My 8 year old and I made this. The only issue was that the colors switched dramatically from our first three colors to the next three. Should we have alternated using the different colors instead of using all the color, which we continued until we were out of that color and then switched to the new color? Does my question make sense?
Yes, your question makes total sense! You did not do it “wrong”, just different, and you’ll get a different (though still very fun) result! If you use three of the same/similar color for your braid, and then switch them all up partway, when you spiral them to make a rug, you’ll get a “bullseye” look, rather than the scrappy look shown here. If you braid all one color shirt for the first 80-90%, and then a second color for the last bit, you’ll have a rug that looks like it has a border around it. These are also lots of fun! Please share a picture of your project on the Little House on the Prairie Facebook page – we’d love to see your progress!
Ok! We are going to make another one and we will try it one of the other ways next time. It was a great project and we really enjoyed it. I’ll post a picture there, but which Little House Facebook group is it?
I’ve tried sewing a t-shirt braided rug together 3 times. It keeps puckering and looks more like a hat what can i do to stop it puckering up?
Thanks for sharing this idea! I’ve braided several wool rugs, but never thought to use cotton and make braided placemats. To make the rug reversible, rather than pinning the ends together at the beginning, I’d stitch them into a T-shape before you begin to braid. Then to end the rug, use a needle nose pliers to tuck the strip raw ends into the next to the last braid and stitch to hold in place. A reversible rug will last longer!
the rugs look great i can handle doing them. my hrs have been cut at work starting in February so i plan to do more crafts,and for the T-shirts i can use the clothes that are to small or just use extra material that I have. Thanks for the suggestions, i cant wait to get started.
Thanks for sharing how its done. I tried to crochet the strips and was too hard to do. Maybe would be easier if I used stretchy t-shirts. But like the braided idea better. To get a supply of t-shirts I will go to Goodwill or Salvation Army as want to use my suppy of shirts for a t-shirt quilt. Helped my daughter make one and it turned out great. We used the flexible iron on backing to stabilize the shirt squares.
love doing crafts
My Mother-in-law made braided rugs n I would enjoy making them n other crafts
LoveLittle House and Love those braided rugs!!
I try to make it thanks for the idea
Hello! Excited to do this, but I have 2 questions… What us a rotary cutter? Also, when you put to cut strips into 2.5″, are you saying 2 and a 1/2 inches? Or 2 feet, 5 inches?
Thank you!
Tina
It’s kinda looks like a pizza cutter but you use it to cut straight lines in fabric. If you look in the second picture you will see a rotary cutter.
I for sure want to make this rug but do you have to use shirts? Can you use used sheets another material?
You can use whatever fabric you have on hand. I had old t-shirts, so that is what I used. I would stick to one kind of fabric, though. If you use shirts, use all shirts and knit fabrics. If you use sheets, stick to woven fabrics (flannel shirts and work shirts could be combined with the sheets). This is because the knit fabrics stretch more than the woven fabrics, and it will be easier to keep an even braid if you stick to just one kind of fabric.
I have been braiding rug material for a while guess I better get busy and put it together
Im so going to try this with my kids and hopefully if i do it right i can give them out as christmas gifts and deccorate my new home next year.